Monthly Archives: September 2015
Be sure to do not have same Datastore name when you mount it to vSphere ESXi
Stupid mistake , yes but be careful the name of datastore when you add via NFS , error is below
2015-09-17T13:45:41.514Z cpu6:35421 opID=8b519c98)World: 15448: VC opID 819e8398-b07c-49f1-8cf7-7d25c0eee9df-3843-ngc-d2-aa-79b2 maps to vmkernel opID 8b519c98
2015-09-17T13:45:41.514Z cpu6:35421 opID=8b519c98)NFS: 157: Command: (mount) Server: (10.111.34.3) IP: (10.111.34.3) Path: (/VMwareDatastore1) Label: (Datastore) Options: (None)
2015-09-17T13:45:41.514Z cpu6:35421 opID=8b519c98)StorageApdHandler: 982: APD Handle 5b1303e5-9075b046 Created with lock[StorageApd-0x4304d1ab6460]
2015-09-17T13:45:41.516Z cpu6:35421 opID=8b519c98)NFS: 347: Restored connection to the server 10.111.34.3 mount point /VMwareDatastore1, mounted as 5b1303e5-9075b046-0000-000000000000 (“Datastore”)
2015-09-17T13:45:41.516Z cpu6:35421 opID=8b519c98)NFS: 218: NFS mount 10.111.34.3:/VMwareDatastore1 status: Success
2015-09-17T13:45:41.520Z cpu6:35421 opID=8b519c98)VC: 2232: Unmount volume b00f 28 5b1303e5 9075b046 60001 2487df73 a945e4e0 f2923383 281971a4 4391 439112e9b600 0 439112e9b600 41800ba7d279: Not found
2015-09-17T13:45:41.520Z cpu6:35421 opID=8b519c98)StorageApdHandler: 1066: Freeing APD handle 0x4304d1ab6460 [5b1303e5-9075b046]
2015-09-17T13:45:41.520Z cpu6:35421 opID=8b519c98)StorageApdHandler: 1150: APD Handle freed!
vRealize Log Insight Genel
Merhaba ,
Bir syslog dan oteye olan vRealize Log Insight 3.0 versionu ile bir onceki versionundan iki kat daha fazla log isleyip yine yeni version ile beraber 12 node a kadar buyuyup gunluk 2.7 TB data isleyebiliyor (1 Master + 11 Worker).
Guzel tarafi ekstra bir sorgulama dili ogrenmeden kendine has grouplama yontemleri ile analiz yapabilmenizi, bunu yaparkende nerdeyse es zamanli calisabilmesi oldukca guzel. Yeni versiondaki sorgulamanin farkli dashboard lara aktarilmasi ile sanki snapshot almisiniz gibi karsilastirma yapmaniz mumkun oluyor.
vCenter , vSphere , vRO ile iliskilendirilebiliyor. Daha fazlasi icin vRealize Log Insight yenilikler . Bunla beraber sisteme tanitilabilen “Content Pack” lerle sadece VMware degil , Linux , Windows , Brocade SAN , Cisco Nexus , UCS , ASA gibi 3th party network device larinda taniyip otomatik log yonetimi , log birlestirme , arama ve uzerinde analiz yapmaniza imkan sagliyor.
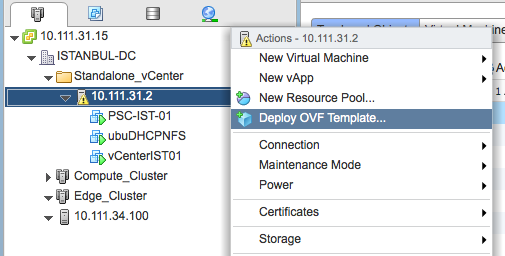
vCenter uzerinden VMware-vRealize-Log-Insight-3.0.0-3021606.ova OVF dosyasini kullanaraktan kurmaya baslayalim.
Ilgili VM i nereye konuslandiracagimizi belirleyelim
Sahip oldugunuz ortama gore sistemin cpu,ram ve disk ayarlayabilmesi icin size uygun konfograsyonu secin , bu kurulumda “Small” secildi
Bu arada disk ile ilgili olarakda islemler oldukca basitlestirilmis, siz VM e yeni bir VMDK eklediginizde bunu otomatik olarak algilayip log alanini otomatik olarak artiriyor sistem. Yazilim ayni zamanda arsivleme ozelliginede sahip, datayi silmektense bir nfs alanina cikabiliyor eski datayi
Evet devam , “Small” secip ilerledim
Thin/Thick/Hangi Store
Network ayarlari
Not: Bu islemler bittikten sonra VM acilip baslangic konfigrasyonu yapildiginda eger ortamda DHCP var ise oradanda IP aliyor sistem daha sonra tum kurulum islemi bittiginde bir sonraki ekranda set edeceginiz statik ip adresi dogru bir sekilde calisiyor
Sunucu IP / DNS / SSH Sifre Islemleri
Bitirelim
Simdi kurulumda devam edecegiz, http(s)://ip_addresi (http -> https yonlendirme yapacaktir) yazaraktan eriselim sisteme
Benim bu ilk kurulumum olacak onun icin “Start New Deployment” secip devam ediyorum
Kurulum devam ediyor …
Log Insight erisim bilgileri
Olmaz ise olmaz NTP
Bu tamam
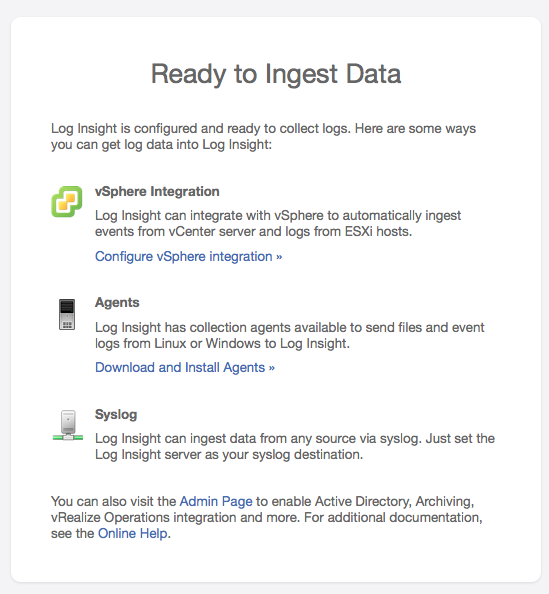
Simdi datayi saglayacak kaynaklari sistem eklemey geldi , benim kurulumuda su anda sadece vSphere Node ve vCenter var
Gerekli ip ve kullanici bilgilerini saglayip test ettikten sonra “Advanced Options” a basip loglamayi TCP olarak degistirin (dilerseniz default UDP birakabilirsiniz)
Bittiten sonra tekrar “Advanced Options” a bastiginizda kofigrasyonu gorebilirsiniz
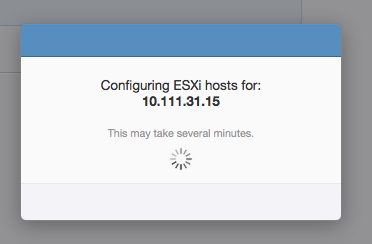
Yeni eklenen node lara ne mi oluyor , onu bende merak ediyorum ama onu Host Profile testimde kontrol ediyor olacagim
vCenter uzerinden hostlari kontrol edelim
Biraz bekleyin loglar gelmeye baslasin ve Dashboard a bakalim
Analize baslaysalim
Linkler :
Click to access log-insight-30-getting-started-guide.pdf
Click to access log-insight-30-administration-guide.pdf
Click to access log-insight-30-users-guide.pdf
VM
vSphere 6 Installation Problem – IndexError: list index out of range
Yesterday i faced and an issue when try to install vSphere 6 . When i selected the disk to install i got such error below :
IndexError: list index out of range
its because of one of the related disk is already used for VSAN before
After boot the server with Centos 7 Live CD and use Discs utility to format the device solve the all problems.
Also Gparted can be used too !
VM
4 in 1 fast config of DHCP NTP NFS and RSYSLOGD for me
Step 1 –> I need a DHCP server for multiple subnets, here is the config
->To install DHCP packages
sudo apt-get install isc-dhcp-server->To set which interface will listen DHCP requests
sudo vi /etc/default/isc-dhcp-server->Here configure INTERFACES=”” section for multiple interface use like this INTERFACES=”eth1 eth2″
->Do some config for subnets , i did not change something about general just added the lines end of the file
sudo vi /etc/dhcp/dhcpd.conf
# vCenter Site A Mng Block
subnet 10.111.31.0 netmask 255.255.255.0 {
range 10.111.31.100 10.111.31.150;
option routers 10.111.31.1;
option subnet-mask 255.255.255.0;
option broadcast-address 10.111.31.255;
option domain-name-servers 8.8.8.8;
}->To see the dhcp deamon
sudo service isc-dhcp-server start->To see the process
dhcpd 1705 1 0 11:35 ? 00:00:00 dhcpd -user dhcpd -group dhcpd -f -q -4 -pf /run/dhcp-server/dhcpd.pid -cf /etc/dhcp/dhcpd.conf eth1->To see the leases
cat /var/lib/dhcp/dhcpd.leasesThats it !
Step 2 –> I need a Local Time Server because my nodes do not have internet connectivity
-> To install ntp packages
sudo apt-get install ntp
-> Jump in to config , i changed already ubuntu time server with my local
vi /etc/ntp.conf-> These are for Turkey local NTP provider
# Specify one or more NTP servers.
# Use servers from the NTP Pool Project. Approved by Ubuntu Technical Board
# on 2011-02-08 (LP: #104525). See http://www.pool.ntp.org/join.html for
# more information.
server ntp1.ulakbim.gov.tr
server ntp2.ulakbim.gov.tr-> These are default don’t touch
# By default, exchange time with everybody, but don’t allow configuration.
restrict -4 default kod notrap nomodify nopeer noquery
restrict -6 default kod notrap nomodify nopeer noquery->Add you nodes network to query time from you
# Clients from this (example!) subnet have unlimited access, but only if
# cryptographically authenticated.
#restrict 192.168.123.0 mask 255.255.255.0 notrust
restrict 10.111.31.0 mask 255.255.255.0 nomodify notrap
restrict 10.111.34.0 mask 255.255.255.0 nomodify notrap->Start the service
noroot@ubudhcpdns:~$ sudo /etc/init.d/ntp restart
* Stopping NTP server ntpd [ OK ]
* Starting NTP server ntpd-> Query it
noroot@ubudhcpdns:~$ ntpq -c lpeer
remote refid st t when poll reach delay offset jitter
==============================================================================
+samur.ulak.net. 131.188.3.221 2 u 565 64 0 9.141 3.471 0.184
*193.140.100.41 130.149.17.21 2 u 97 64 326 9.018 2.773 1.273
juniperberry.ca .INIT. 16 u – 512 0 0.000 0.000 0.000->I used it for local ESX i nodes, check it
[root@vCENTER-sITE-a:~] ntpq -p
remote refid st t when poll reach delay offset jitter
==============================================================================
*10.111.31.3 193.140.100.41 3 u 51 64 377 0.072 8.987 0.408Thats it !
Step 3 –> I need a iso store , install nfs and share it
-> To install ntp packages
noroot@ubudhcpdns:~$ sudo apt-get install nfs-kernel-server-> Configure export , first create the folder start to upload iso files and then export it
sudo vi /etc/exports
/isos *(ro,sync,no_root_squash)
noroot@ubudhcpdns:/$ sudo /etc/init.d/nfs-kernel-server start
* Exporting directories for NFS kernel daemon… exportfs: /etc/exports [1]: Neither ‘subtree_check’ or ‘no_subtree_check’ specified for export “*:/isos”.
Assuming default behaviour (‘no_subtree_check’).
NOTE: this default has changed since nfs-utils version 1.0.x[ OK ]
* Starting NFS kernel daemonThats it !
Step 4 –> Configure rsyslogd to convert your server central logging
–> First create a folder name “loggs” then change the owner of it
noroot@rabbitmq:/var/log$ sudo chown syslog:adm /logss
Above i used syslog:adm because under /var folder some of folders owner set like that
–> Edit rsyslogd.conf and add/changes realated lines
(myself i activated udp/tcp together)
# provides UDP syslog reception$ModLoad imudp
$UDPServerRun 514
# provides TCP syslog reception
$ModLoad imtcp
$InputTCPServerRun 514
and add such lines end of the file
# Dynamic Remote Loggin Config
$template FILENAME,”/logss/%fromhost-ip%/syslog.log”
*.* ?FILENAME
–> Restart rsyslogd and try you get the logs or not !
Some notes :
its possible to use %PROGRAMNAME% tag for file creation
*.* ?FILENAME –> get all type of events not just only “cron.*” or others and ?FILENAME is like a placeholder
then under the path with host ip address logs are will be stored
VM


