
NSX-T and NSX ALB Installations Challenges
I already have working NSX Advanced Load Balancer but because of CSE 4.0 requirement is 21.1.3 i have to downgrade/recreate NSX ALB Cluster (Yes there is no running customer on it before 😀 )
Actually this article will point some other people already find a solution and what i applied but what i want to do hope more people access and find solution easily.
Everything was started when i deleted NSX ALB from NSX-T Manager (using 3.2.1.0.0.19801963) to install 21.1.3.
First problem is about NSX ALB ova file of controller-21.1.3-2p2-9049.ova , it was very strange upload process never over and hang sometimes %99 , sometimes %100 😀
Bakingclouds find the reason which about absent certificate of file, pls read this article. Simply there is no valid certificate and because of that upload never over and the way is find lower version of NSX ALB install it and then upgrade it required one 😀
Another problem, when try to deploy new NSX Advanced Load Balancer Cluster you are getting interesting problems like “Controller VM Configuration Failed” which you can see here.
I don’t know right now for only 3.2.1.0.0.19801963 version this is happening but like a cache or something remains in NSX configuration and need to cleanup related area, two good articles i’m sharing 1, 2
This is it
VM

Ubuntu 22.04 Cloud-Init vSphere vCD Customization Hell
This article about who want to still continute to have cloud-init with Ubuntu 22.04 and want to make customization when using VMware Cloud Director.
This article also could show some very simple things also show what is it ? and why i’m doing this things.
Everything started with How i could make customization with Ubuntu 22.04 without uninstall cloud-init.
Main problem is you will feel like everyting will work after customization but cloud-init will set to DHCP after next reboot kb 71264 !
Please read this links without getting bored 1 , 2 Somehow cloud-init feels need to recustomize vm and because of there is no input that time from VMware cloud-init will try to recustomize network settings and set to DHCP 😀
First link of course from VMware, always need to query about Guest OS Customization, use this link and related os and vCenter versions. For Ubuntu 22.04 support links contents are not enough.
Short before customization what you should do;
Activated root password and root password based logging before execute each commands next and deleted installation time created user. To delete installation time created use after activate root, i rebooted server and then delete it.

VMware Cloud Director and Google IdP SAML Config
VMware Cloud Director do not have built-in OTP support but each organization can use SAML 2FA/MFA purpose.
Yestarday with my two friends Kemal Tek and Arif Alpagut made a test for see how SAML configuration could done by Google as an Identitiy Provider.
SAML provides a solution to allow your identity provider and service providers to exist separately from each other, which centralizes user management and provides access to SaaS solutions.
When a user logs into a SAML enabled application, the service provider requests authorization from the appropriate identity provider. The identity provider authenticates the user’s credentials and then returns the authorization for the user to the service provider, and the user is now able to use the application.
In this article VMware Cloud Director is SAML enabled application, Google is identity provider (IdP).
Many IdP out there for example Azure could be if you wonder SAML flow, check it below.

Lets configure SAML for our VMware Cloud Director tenant which name is Aren-Tenant1-Corlu
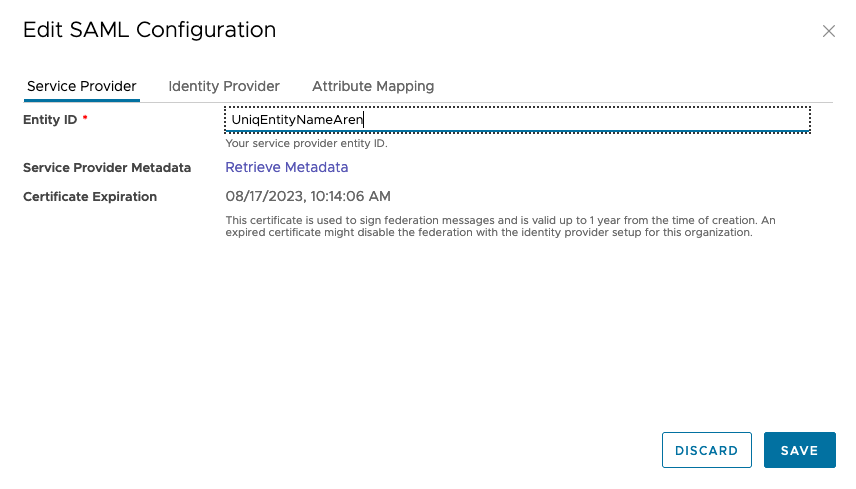
Let login to tenant portal, go to Administration tab, from Identitiy Provider section choose SAML and click CONFIGURE.
Not : From GUI if its one time configured there no option to clear everything, only thing is disable identity provider.
Give an uniq name for Entity ID you will use this on IdP site, you can also retrive the metadata to use it when configure custom SAML App at Google.
For example you will use url below for redirection from google which is ACS URL (Assertion Consumer Service), check the md:AssertionConsumerService section in metadata file
https://vcdtekcor01.dorukcloud.com/login/org/aren-tenant1-corlu/saml/SSO/alias/vcd
Login to your Google Admin Console and go to Apps > Web and Mobile Apps section and add an custom SAML app.

Set app name , desc and picture …
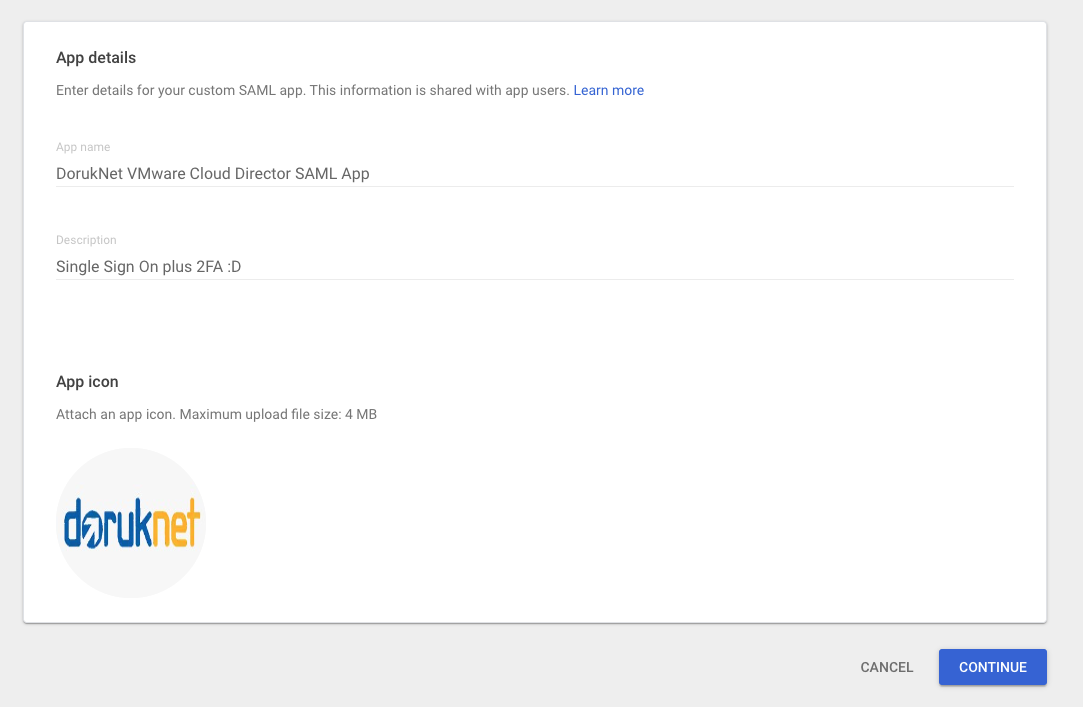
Use option 1 and download metadata

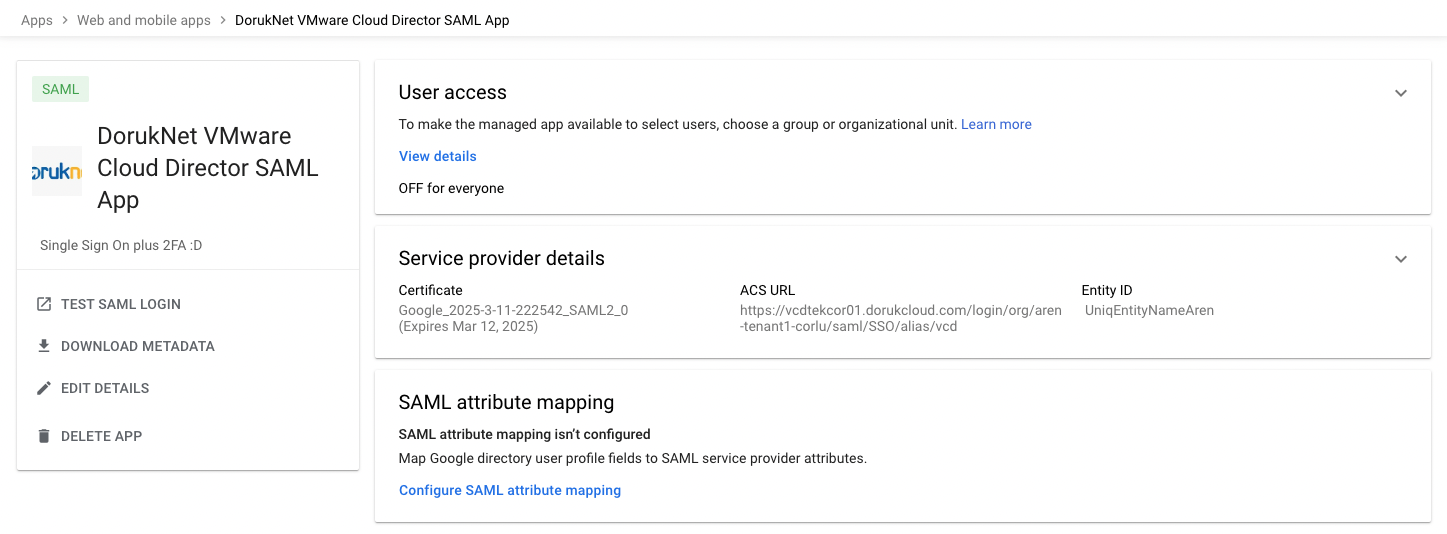
Set ACS,Entity ID, Start URL and Named ID like below ( be carefull about spaces when you copy/paste 😀 ) Named ID format will be EMAIL, leave the Named ID Basic Information > Primary Email.
if you wonder what is Named ID ; SAML 2.0 name identifier formats control how the users at identity providers are mapped to users at service providers during single sign-on. Security Access Manager supports the following name identifier formats: Email address.

You can see some articles add different attributes but i did not, actually with SAML also we can get some values from IdPs.

Then it will looks like below ….
Then enable for your users in your organisation to access this custom SAML app. Over the mouse on OFF for everyone and click on it then select ON for everyone.
*I’m not google expert just only allow access to related user to use such app.

Lets back to VMware Cloud Director, upload Google Metadata, import google user as a SAML user.
From Identity Provider tab activate it and upload the metadata which is downloaded from Google. The picture below there is a button REPLACE METADATA XML FILE becuase this is second time i’m configuring SAML with Google.

Then IdP become active.

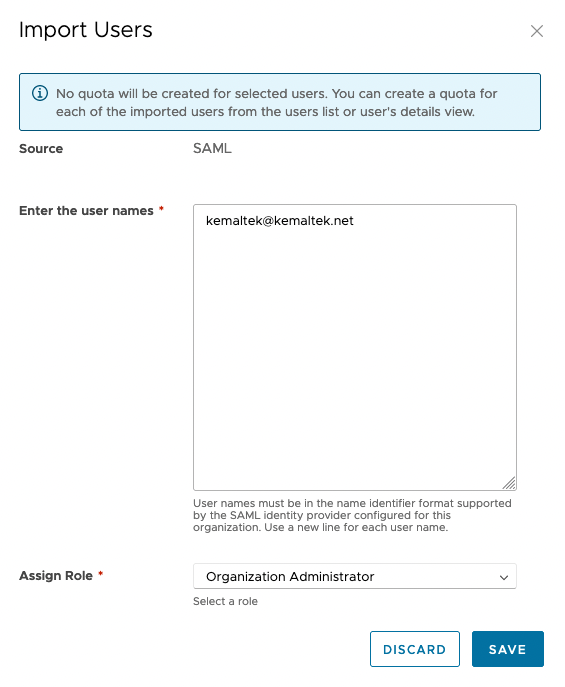
Now time to import user, go to Administration tab, from Access Control click Users then Import Users and type your organisation user email address.
Try to login VMware Cloud Director with tenant url, you will see additional option SIGN IN WITH SINGLE SIGN-ON and then standard google authontication process will start, you can auth via email, google app what google IdP offer you …

You can see that on the up right corner you are logged with your google account.

*Note sometimes when you made some changes on google about settings somehow you are getting “Error: app_not_configured_for_user” or like that , clear the cache or wait little then everything start to work again. Never give up 😀
Thats it !

Ubuntu/Debian NFS and VMware Cloud Director Database backup Permission Denied Issue
Actually i never faced such issue with Centos 7/8 before, after Centos Stream happen generally too many people start to look different OS to use. Ubuntu is one of this ….
Our VMware Cloud Director use NFS for transfer/shared storage and its on Ubuntu. There is no issue about installing cells but have an issue about backup PostgreSQL. Error is permission denied.
Problem is not about rights or any settings. Support informed that “RPC mount point handling in nfs-kernel”
When we start to search find out something about –manage-gids, its about user and that user joined 16 groups and this time some problems happen about NFS Server and NFS Client UID/GID binding.
There is a file in Ubuntu 20.x /etc/default/nfs-kernel-server. there is an option here like RPCMOUNTDOPTS which came default RPCMOUNTDOPTS=”–manage-gids” . Remove –manage-gids and leave the option empty like RPCMOUNTDOPTS=”” and restart NFS server and reboot the vcd cell (also i believe you can remount it but its safe to reboot)
Everything will be fine !
VM
Unauthorized is not Unauthorized sometimes vCloud Director 10.2.2
Actually problem is not about vCD 10.2.2, also problem is not about username and password too !
its very hard to understand the problem or maybe easy to catch but must be careful
Guilty is max header 😀 and myself maybe you 😀
What happened ; when i couldn’t see rights bundle correctly from provider UI somehow i clicked SAVE maybe and vCD overwright and takes all rights from “Default set of tenant rights” and i started to get “Authentication Error”
But interesting thing is from event i can see the login successes.
First i fixed haproxy
To tune haproxy add parameters under global section
    tune.bufsize 65536
    tune.http.maxhdr 1024
Not: I tried HTTP/2 but something goes wrong and back to 1.1 again maybe someone can try and comment out in this article.
Then checking 9.5 release note and set max header for it but don’t forget before check related values if its not correct then apply.
Without this you can see “HTTP 502 errors” when you inspect the page
Thanks for developers 😀 no any warning for “Hey , you will overwrite all rights , are you sure ? ” or in debug log say something instead of Authentication Error ” permission or no right error” indicated.
Finally using via api need to resend all rights back.
Not for you, always backup your rights and roles at the startup , when you made change too maybe one day you could need it to set it back via lovely swagger.

NVMe-oF
Hızlıca nedir bu NVMe-oF , terimler ne, neden kullanılıyor , hayatımızda ne değişeceğini geleneksel yapılar üzerinde inceledim ve VMware kullanıcıları için hpp ve birkaç sorun gidermek için komut örnekleride ekledim …
NVMe sunucularımızdaki SSD’leri PCIe yoluna bağlayabilmek için kullanılan bir arabirim ve protokolden ibaret.
NVMe’nin adreslemek istediği iki şey var, biri hız diğer ise düşük tepki süresi. Bunu adresleyebilmek için artık hem SATA, SAS gibi interface’lerden kurtulmak hemde SCSI gibi eski ve paralel çalışmaya uygun olmayan bir komut işleme ve kuyruk yapısından kurtulmak gerekiyordu. NVMe’i çok kollu bir robot’a , SCSI’i ise tek kolu robota benzeten yazılar var, ki aslında bunun biz firewall, load balancer, sanal makinelerin network kuyrukları gibi envayi çeşit örnek ile açıklayabiliriz, olay elimizde hızlı bir medya var , bu medya yapabileceği çok iş var bunun için ona çok daha fazla iş yüklemek gerekiyor SCSI bunu yapamadığından NVMe çıka geliyor ve paralel çalışabilecek bir kuyruk yapısı ve aynı anda çalıştırabileceği disk komut setleri sayesinde aynı zamanda yapısı gereği daha az katmandan geçerek direkt erişim sağlaması nedeniyle olayı hızlandırıyor.

NVMe etki alanı bulunduğu fiziksel sunucu üzerindeki maksimum disk sayısı, disk boyutu ve erişirliğin ancak yerel olaması ile sınırlı.
Daha fazla toplam kapasite, daha iyi doluluk oranları, paylaşımlı erişim ve storage dünyasından aşina olduğumuz snapshot, dedup gibi servisler için farklı bir yaklaşım gerekti buda NVMe ‘i bir fabric üzerinden taşıma ve geleneksel dediğimiz storage’lar için uyarlanmasını gerektirdi.
NVMe taşıma için iki tip fabric mevcut, bir RDMA diğeri ise Fiber Channel.
RDAM fabric diyince önünüze ROCE ve iWRAP gib ethernet tabanlı bağlantı tipleri gelecek.
FC fabric deyince ise NVMe-oF gelecek bildiğimiz SAN.
NSX-T Backend and import Segments like old days external networks to OrgvDC
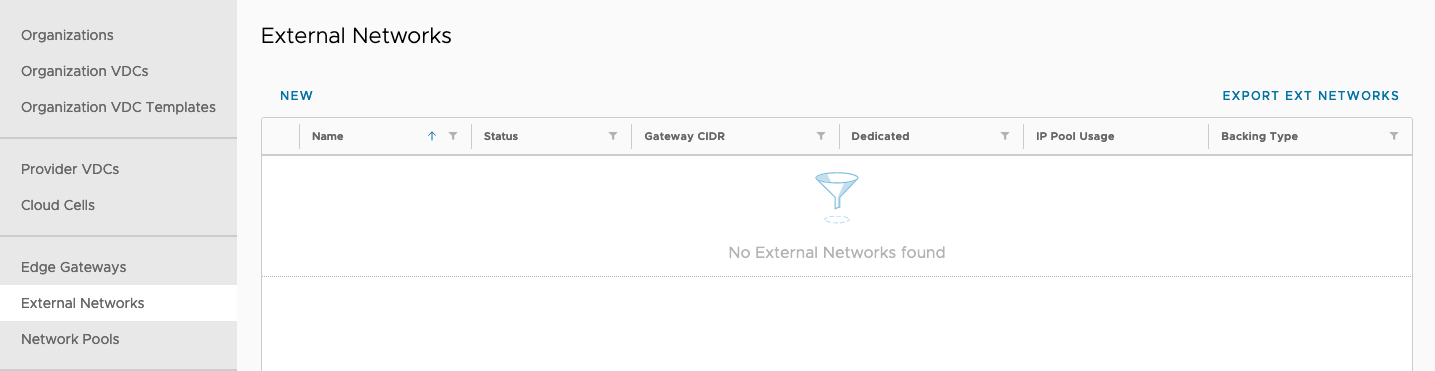
When i saw there is no direct network for NSX-T backend i little surprised, thing that where gone old port groups what we were adding before under External Networks and then assign to OrgvDC
Good news if still using NSX-V backend its allowed, you can continue until migrate it to NSX-T
Come to NSX-T again, still there is a way to do it but with different style ;
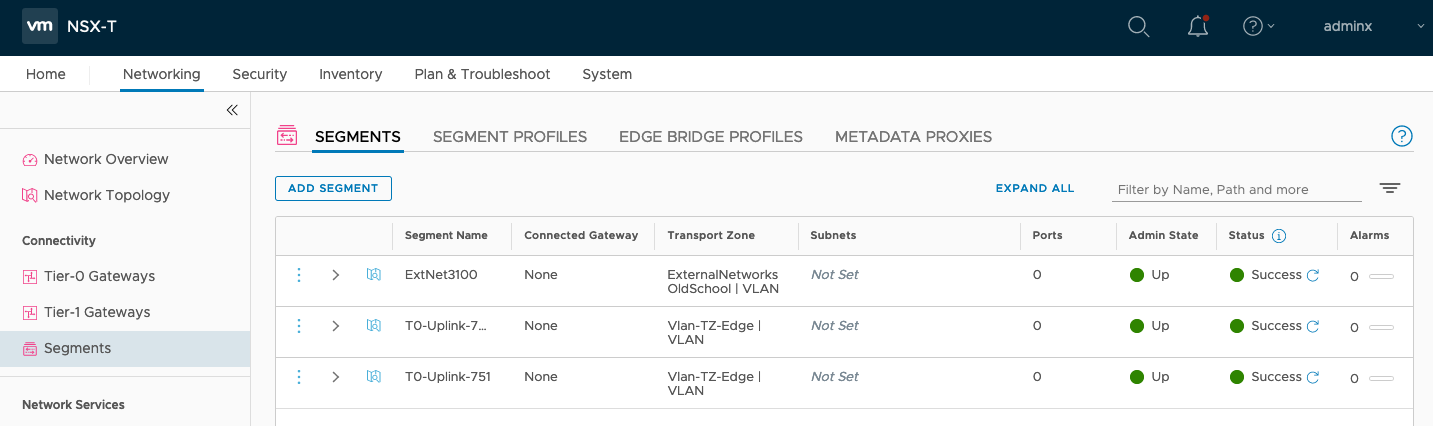
New object name is a segment, I mean instead of create port group via vCenter we will start to create a segment which will be shown NSX-T managed port group, all other settings like uplink profile, modes and other things will be managed via NSX-T Manager.
Go to Segments from Networking and click ADD SEGMENT
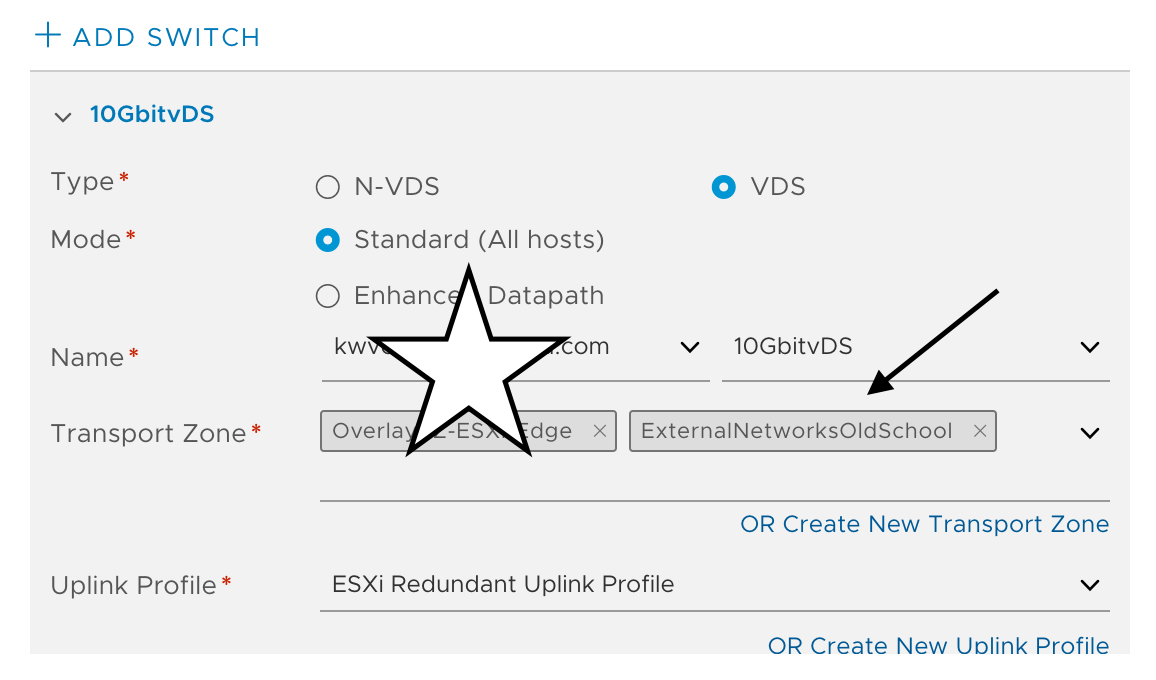
Don’t forget related Transport Zone also need to be assigned related vSphere or vCenter vSphere Nodes which will help under what distributed switch related port group will be created.
Not* I’m using vSphere 7 with vDS integrated NSX-T
Set only name of the segment, important part is you have to choose Transport Zone and set VLAN ID.

Wait status turn to green ….


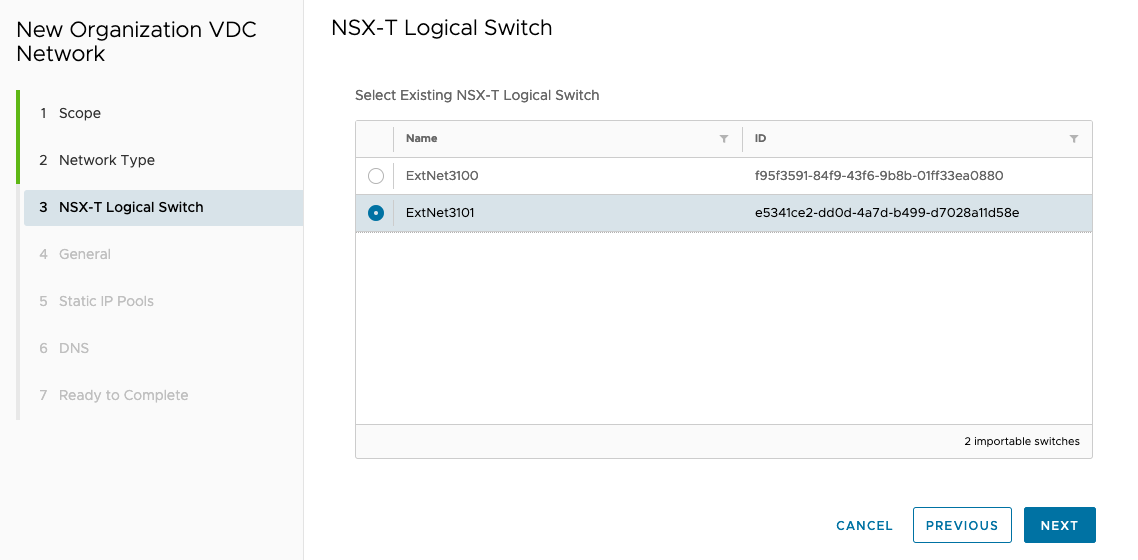
Then via vCD Administrator tenant portal you can import this segment to related organization again like old days …

NEW –> Current Organization –> Choose Imported
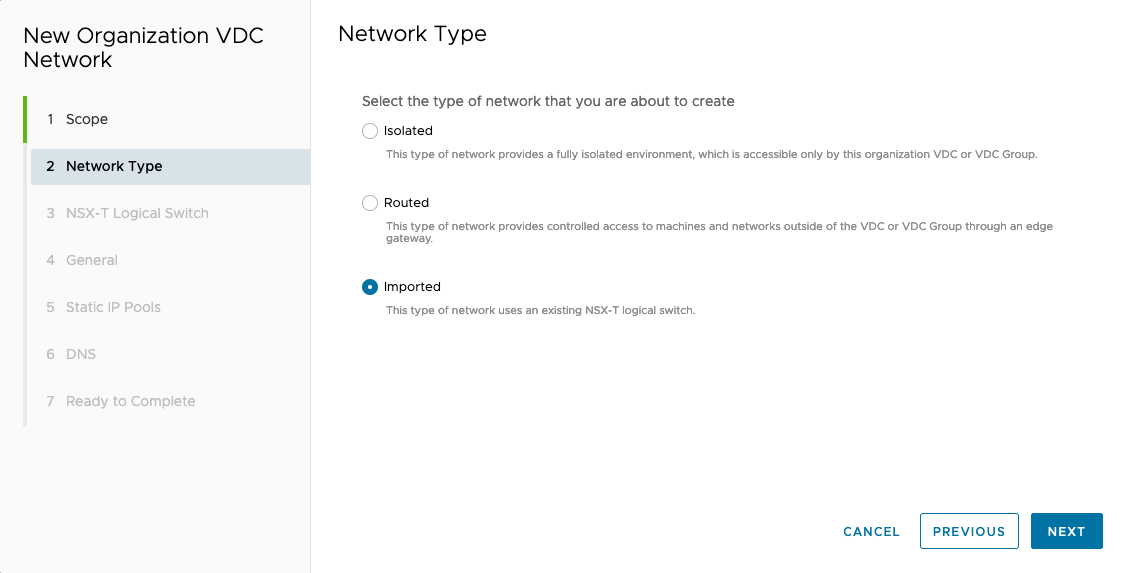
Choose what you created segment before
Then set gw , ip range and dns like before …
Go to vCenter, you will see the related segment like a port group but its NSX-T managed segment ….

Happy networking 😛 😀
VM
Better Standby Appliance Setup with vCD 10.2
First I little confused when i couldn’t see “VCD Configure” section and questioned where i will set my nfs server settings 🙂

Good thing is, its really perfect set ntp server and IP address and next 😀 another setup screen will wait you after OVF deployment over and you will set nfs server and path there
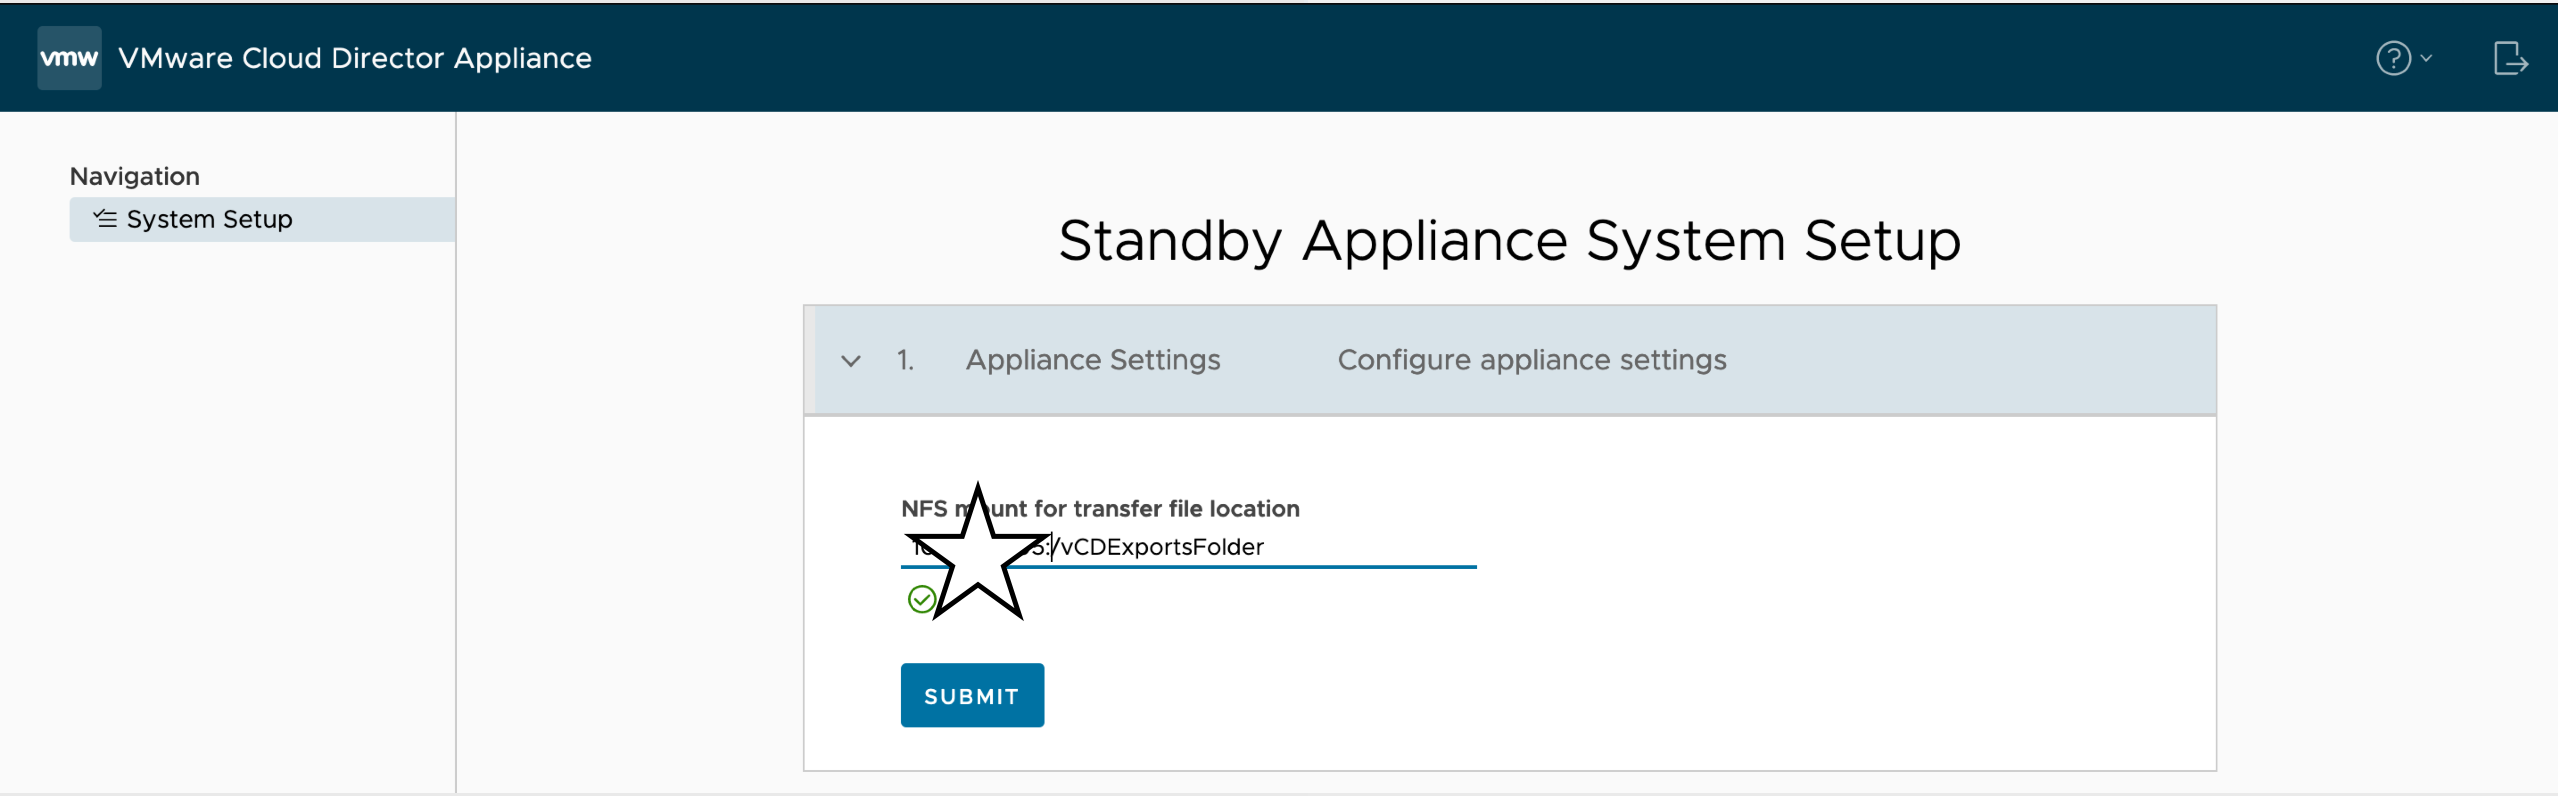
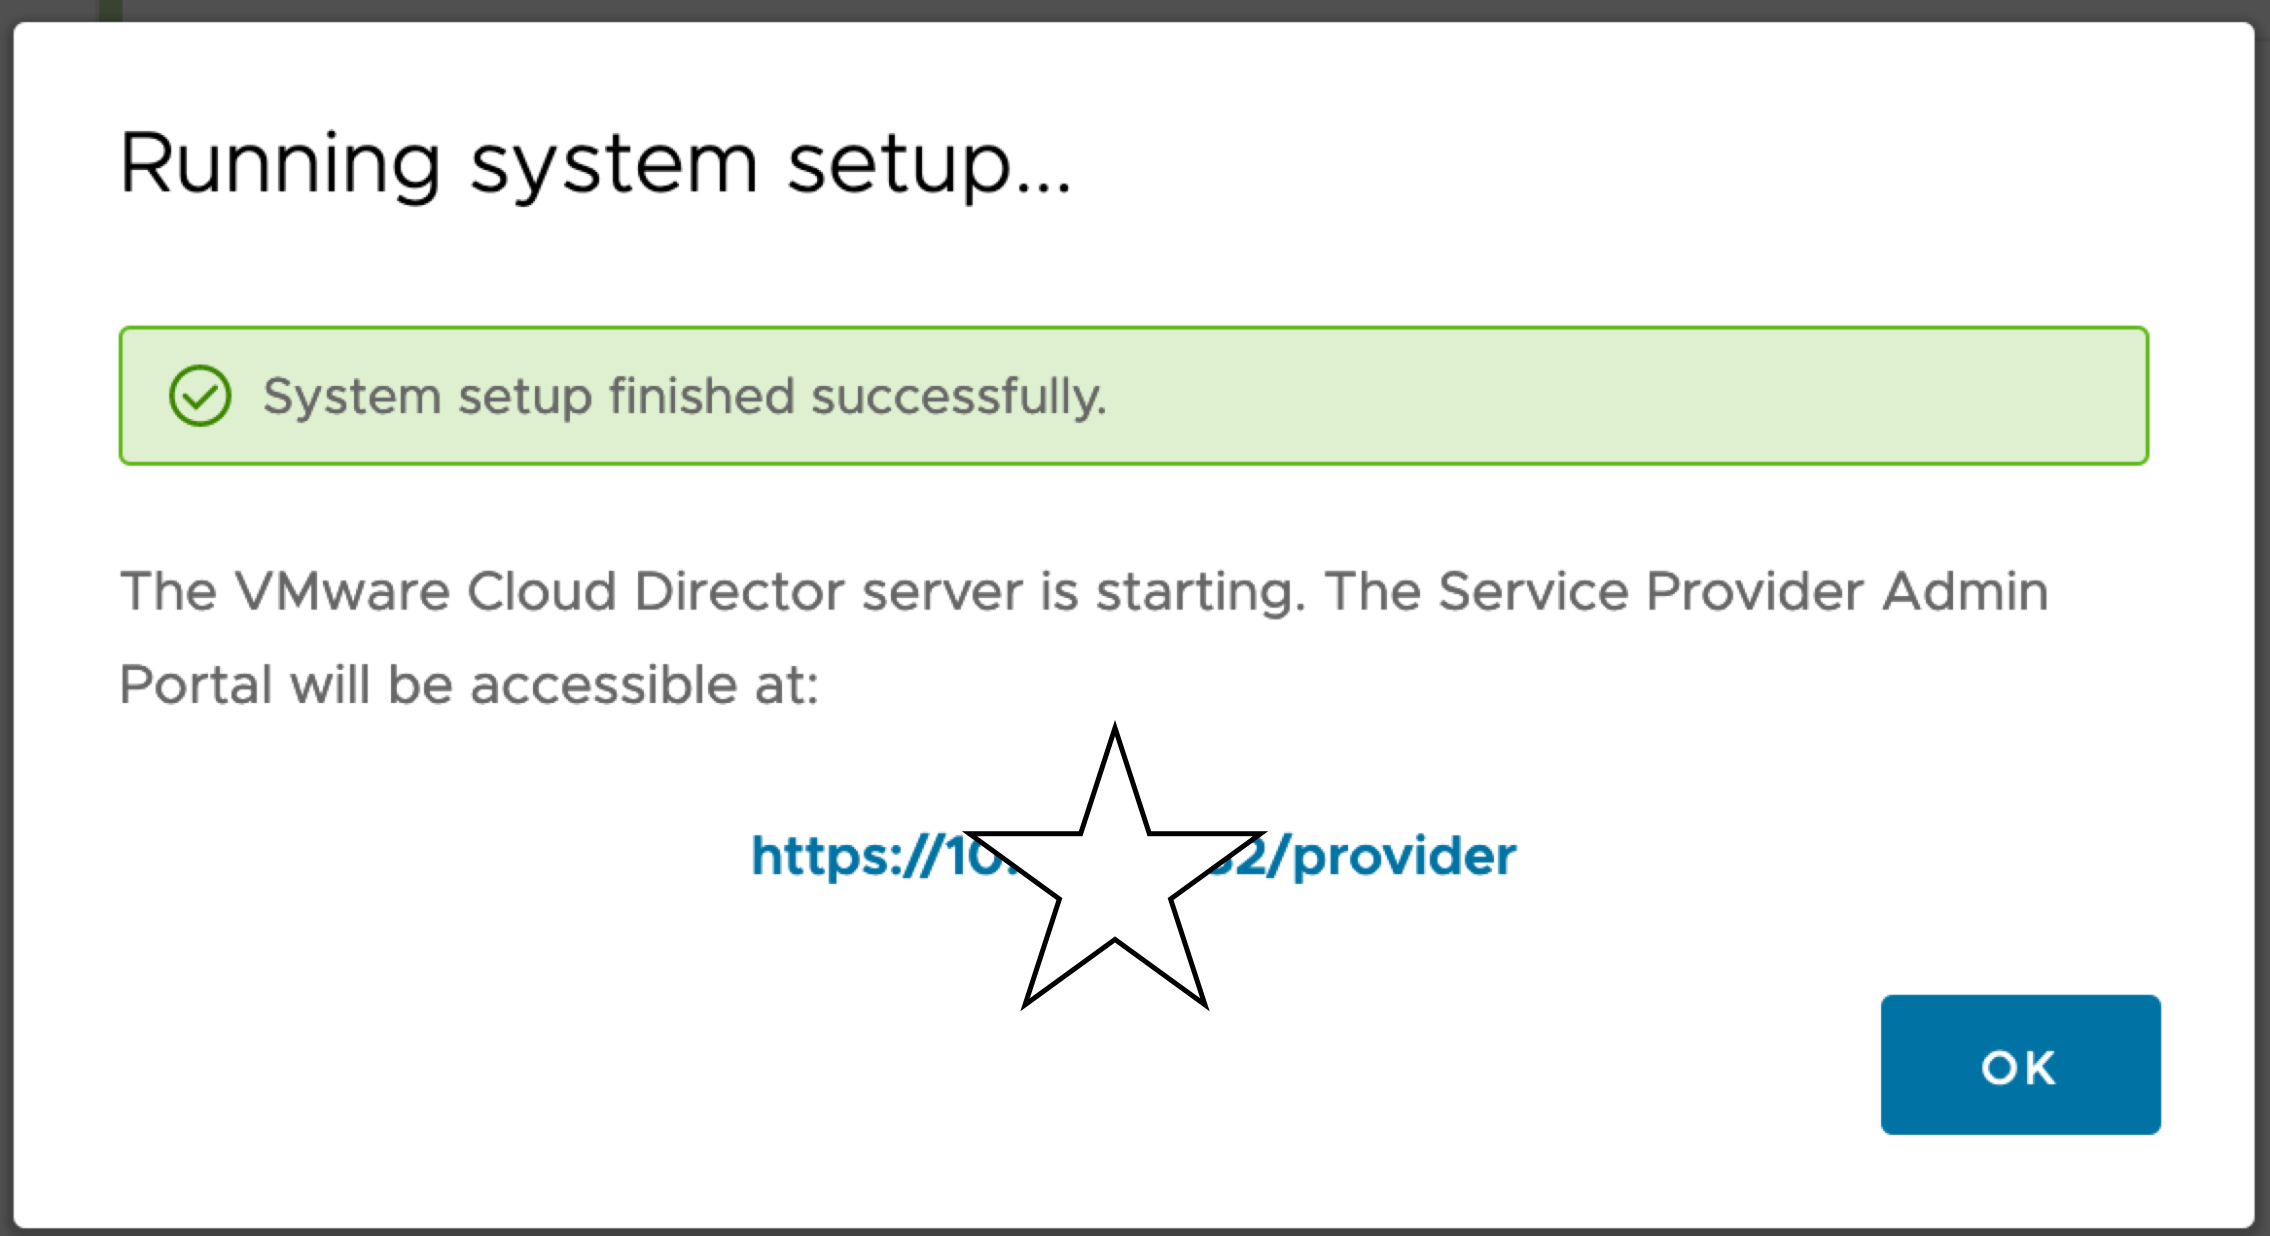
SUBMIT and wait for DB sync

its over …
Check health, its important because if you set automatic failover its mode will be (as for me) INDETERMINATE
Set it automatic via api again, if you need a help to set it check this out.
🙂
VM

vCD Upgrade or Patch after 10.1 :(
This story started when i gently f*ucked my vCD HA 3 nodes version upgrade from 10.1 to 10.2
My database availability mode was AUTOMATIC 😀
Because of it, i did not read prerequisites good enough, executed Guest OS Shutdown for vCD Primary node and I felt like perfect because i already got the backup and easy will take snapshot and continue to upgrade but after reboot saw that I have two primary, one is failed state (of course its my old primary db)
I expected that I have to do something to fix this with like re-register primary node as a secondary or/and use repmgr node rejoin (also saw something from Stack Overflow) but because of its in production and no need to take risk, i fallowed the way ;
Unregister vCD Node from repmgr : (Here because of this node remain primary use primary flag to remove)
/opt/vmware/vpostgres/current/bin/repmgr primary unregister –node-id=7590 -f /opt/vmware/vpostgres/current/etc/repmgr.conf
Then I deleted related vCD node and create new one as a standby and join to the cluster again, after looks like everything is fine, we are in game again …
Read the rest of this entry
Auto Deployment of NSX-T 2nd and 3rd manager deployment failed/hanged
Actually this is very stupid situation maybe you could face with this issue
After first NSX-T 3 Manager deployment 2nd and 3rd deployments are done by NSX-T Manager UI. Somehow when trigger auto deployment installation hang %1.
When I check from vCenter, yes there is an event for deployment but its 0% and time out after ..
After some investigation i saw that different dns servers are used for vCenter and NSX-T Manager and somehow DNS server which used for NSX-T Manager have zone record for domain and because of that zone do not have related records NSX-T Manager couldn’t resolve FQDN of vCenter and OVF upload never over and timed out …
After fix dns issue problem has been resolved …
